The Best iPhone Camera Settings for Social Media Content
Your iPhone camera is probably capable of creating better social media content than you’re currently getting out of it.
And before you buy another camera, lens, light, or tiny microphone someone convinced you was life-changing on TikTok, check your settings.
A few small changes can make your photos and videos easier to shoot, edit, and upload consistently.
Here are the iPhone camera settings I recommend checking for social media content.
1. Record video in 4K
Go to:
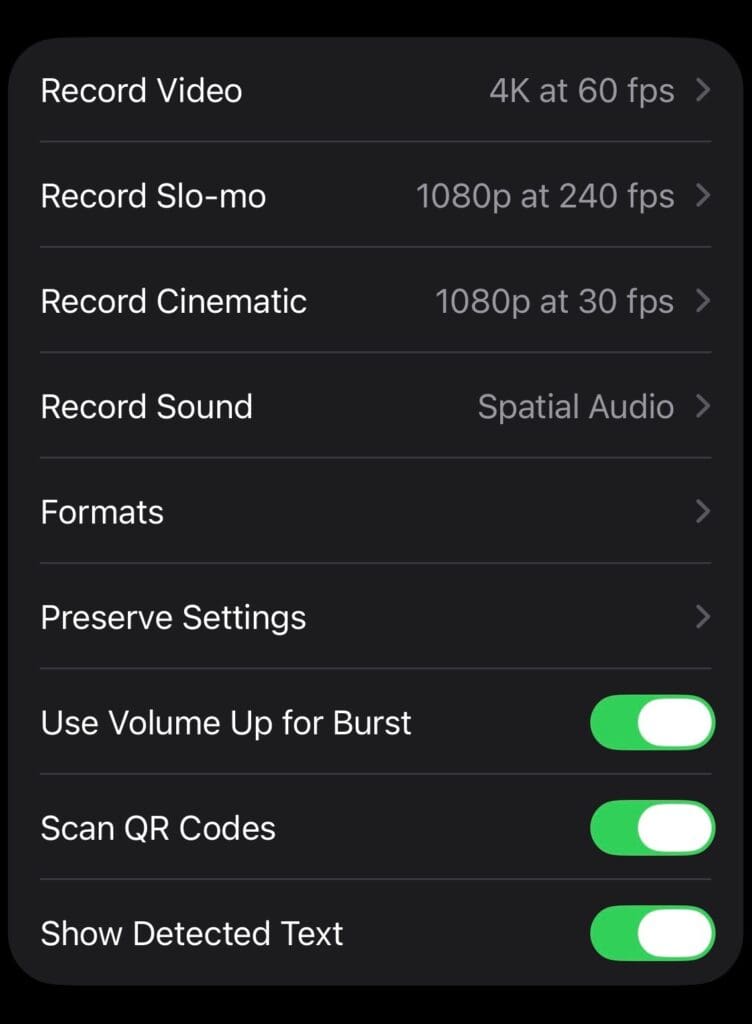
Settings → Camera → Record Video
For most social media content, I recommend recording in 4K.
4K captures more detail than 1080p and gives you more flexibility when editing, cropping, or reframing your footage.
You’ll see several frame-rate options here too.
For everyday social media content, 4K at 30 fps is a great default.
It’s high quality without making every casual Reel a Hollywood production.
2. Know when to use 60 fps
Higher isn’t automatically better.
30 fps works well for most talking videos, B-roll, tutorials, and everyday content.
60 fps can be useful when you’re filming faster movement or when you know you’ll want to slow the footage down during editing.
The tradeoff is larger file sizes and potentially different performance in lower light.
If you have no idea which one you need?
Start with 4K at 30 fps.
3. Consider turning HDR video off
Go to:
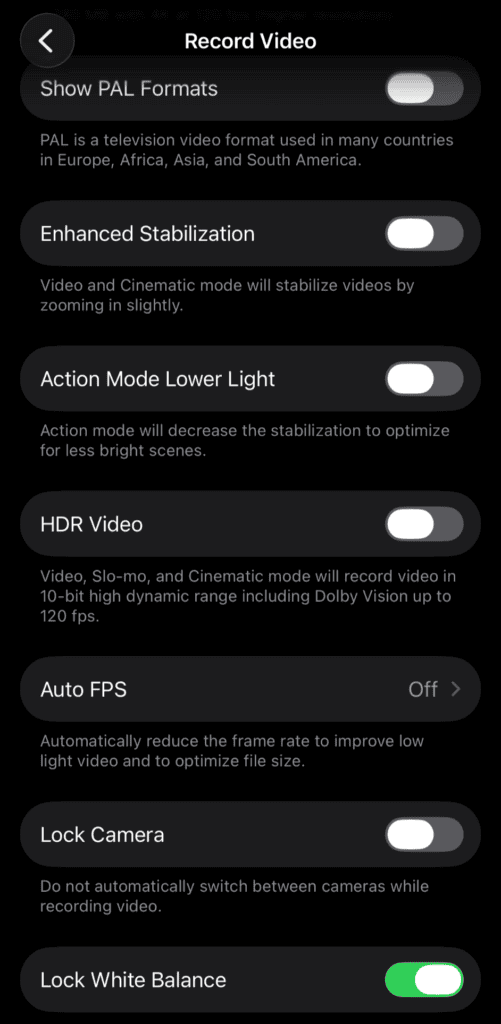
Settings → Camera → Record Video → HDR Video
HDR can capture a wider range of brightness and color, and footage can look beautiful on a compatible screen.
The problem can come when that video leaves your Camera Roll.
Different apps, editing software, devices, and social platforms can handle HDR differently, which can sometimes leave uploaded content looking noticeably different from the footage you originally shot.
For a simple, consistent social-media workflow, I generally recommend turning HDR Video off.
This was one of the settings behind my original iPhone camera post, and apparently a lot of us had been personally victimized by HDR without realizing it.
4. Turn on the grid
Go to:
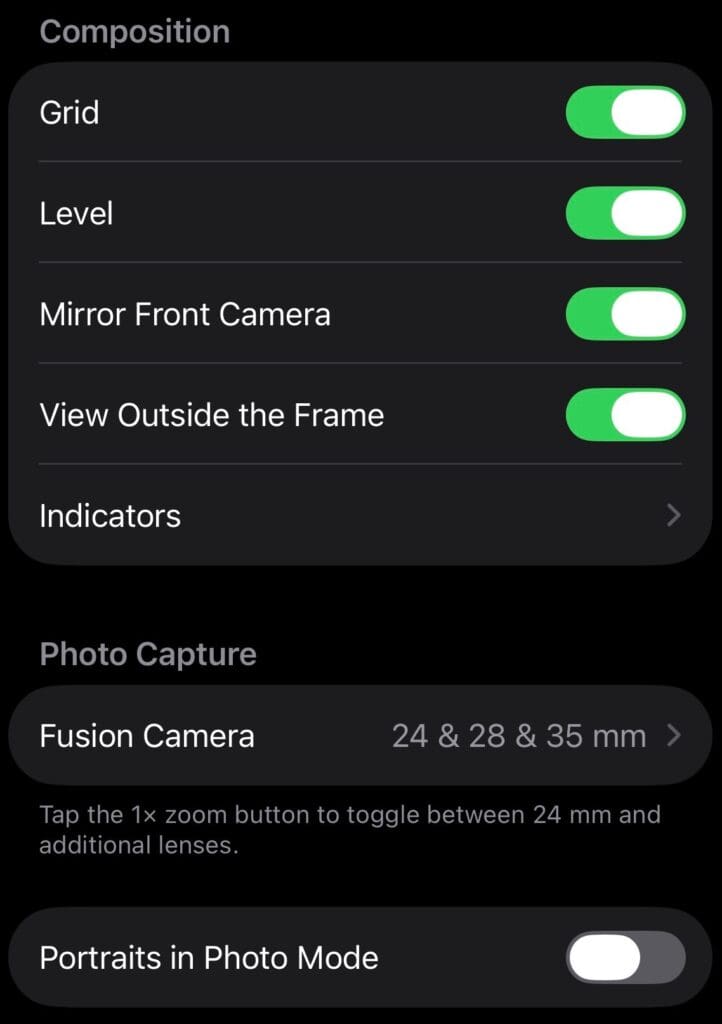
Settings → Camera → Grid
Turn it on.
The grid adds guides to your camera screen that can help with composition, framing, and keeping your subject positioned intentionally.
It doesn’t change the quality of your image.
It just makes getting a better shot easier.
5. Turn on Level
While you’re there, turn on:
Settings → Camera → Level
The level helps you keep your shot straight.
It’s particularly useful for overhead product shots, flat lays, interiors, food, or anything else where realizing everything is slightly crooked after filming would be deeply inconvenient.
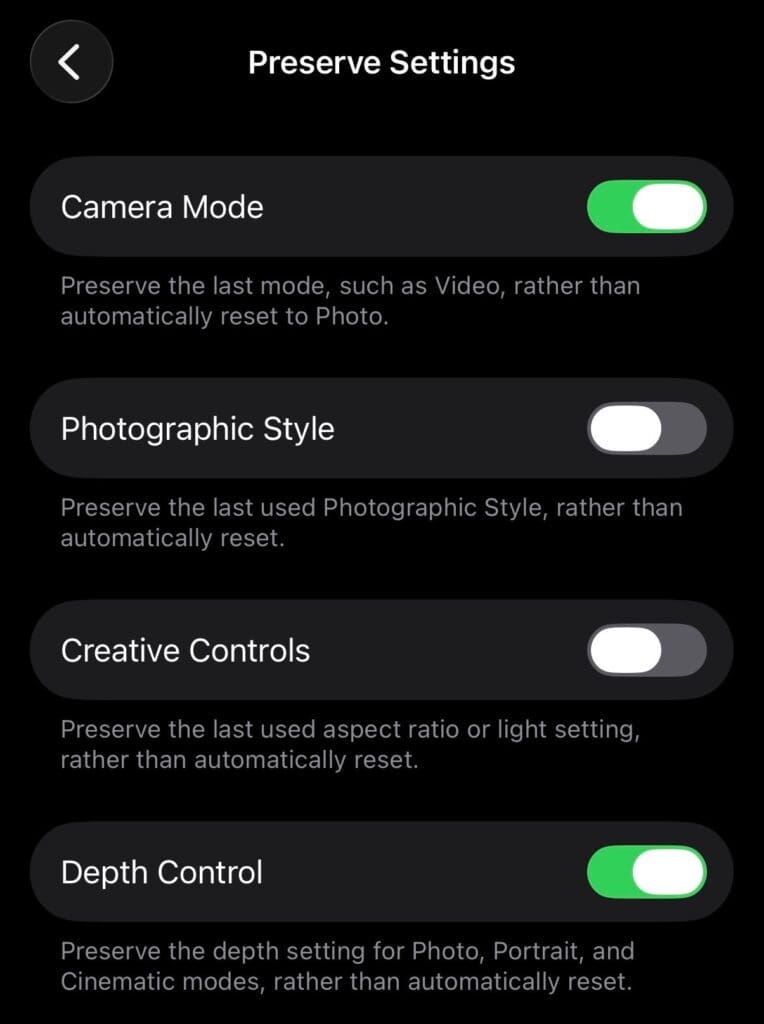
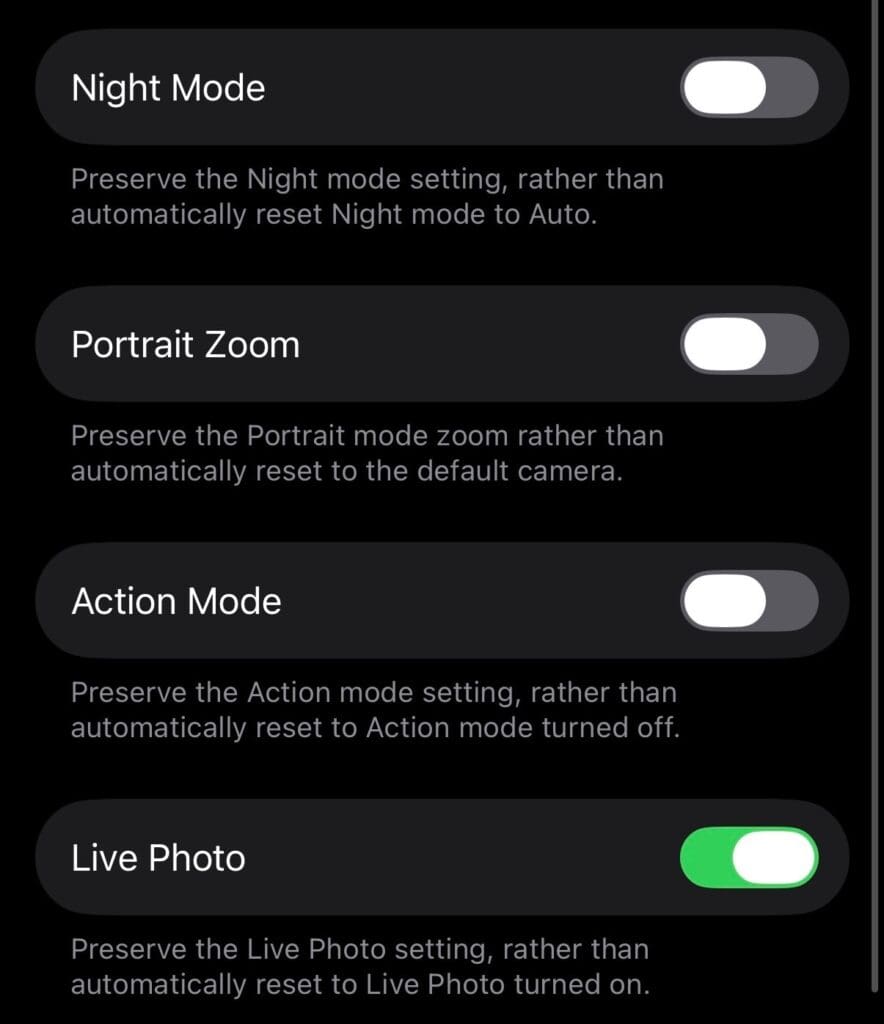
6. Check Preserve Settings
Go to:
Settings → Camera → Preserve Settings
This section lets you control which camera choices your iPhone remembers instead of resetting every time you open the Camera app.
Depending on how you shoot, preserving things like your camera mode, exposure adjustment, or other creative controls can save you from repeatedly changing the same settings.
There’s no single perfect setup here for everyone.
The goal is to make your camera behave predictably for your workflow.
7. Stop relying on digital zoom
This isn’t technically a setting, but it’s one of my favorite easy upgrades.
Whenever possible, use your iPhone’s available camera/lens options rather than pinching the screen to digitally zoom into your subject.
Digital zoom can reduce image quality because you’re essentially enlarging part of the image rather than capturing it with a different optical perspective.
And sometimes the highest-quality zoom available is still:
your feet.
Move closer.
8. Clean your camera lens
Again, not a setting.
Still potentially the most important thing on this list.
Your phone spends its entire day being touched, tossed into bags, set on counters, and generally living a much harder life than an actual camera lens.
Before filming, wipe the lenses.
It takes approximately two seconds and can fix the mysterious haze people sometimes try to solve with $200 worth of equipment.
My default iPhone setup for social media
If all of that felt like too much information and you just want somewhere to start:
Video: 4K at 30 fps
HDR Video: Off
Grid: On
Level: On
Then adjust based on what you’re filming.
Because there isn’t one camera setting that makes content good.
Lighting matters. Composition matters. Audio matters. What you’re filming matters.
And, unfortunately, the camera still cannot come up with the idea for you.
But starting with the right settings gives you much better material to work with.
Better content doesn’t always require better equipment
One of the easiest traps in content creation is assuming your content would look better if you bought something else.
Sometimes that’s true.
A lot of the time, you haven’t fully used the camera that’s already in your hand.
Learn your settings. Learn good lighting. Learn how to frame a shot. Then decide what equipment would actually make your work better.
Your iPhone is a pretty capable camera.
You just have to stop leaving everything up to its factory settings.


